

Rotating Gallery Wall
Convince everyone that you have the world’s largest fine art collection with this simple rotating gallery wall. Just fill a Ziploc® brand bag with your child’s artwork and seal shut. Perfect for when you have quite a few (or several) pieces of art to display/store. Tighten a trouser clamp hanger along the top of the Ziploc® brand bag and hang on the wall using a nail, thumb tack or hook. Repeat with multiple bags for a show-stopping gallery of artwork. When it’s time for a new piece to shine, simply move a different masterpiece to the front of the bag, and the old to the back. It’s like hanging that pile of art in a pretty way! Rotating Gallery Wall


Framed with Washi Tape Art Wall
So many pieces of art, so don’t want to put a lot of holes in the wall. If you’re looking for an easy mounting/framing solution, just take it back to basics! Simply adhere individual works to the wall with colorful washi tape. (Washi tape is a low-adhesive tape made from rice paper. You can use and reuse without hurting your walls, and it comes in the cutest colors!) Stock up on unique colors, patterns, and widths for an exciting gallery wall. Try different approaches: Go minimal and use small pieces on the corners, or use the tape around the edges to create a colorful “frame.” The possibilities are endless! Framed with Washi Tape Art Wall


Painted Box of Art Treasure Storage
Want to store your inspired, unique artworks in an inspired, unique way? Unfinished wooden boxes (easily found at craft stores) get the job done. A classic wooden box fits conveniently on any tabletop or shelf, and hand-decorating it yourself allows you to choose colors that coordinate with your decor. We recommend coating the entire box with spray paint, and then hand-painting your child’s name with acrylic paint in a contrasting color. This way your kids will feel like their artwork is still on display, and they can look through it whenever they want. You can also let the little ones decorate it if you’re looking for a weekend craft to do. Bonus: To organize the contents, sort by year in different sizes of Ziploc® brand bags. Use a piece of tape or label to denote the year on each bag. Painted Box of Art Treasure Storage


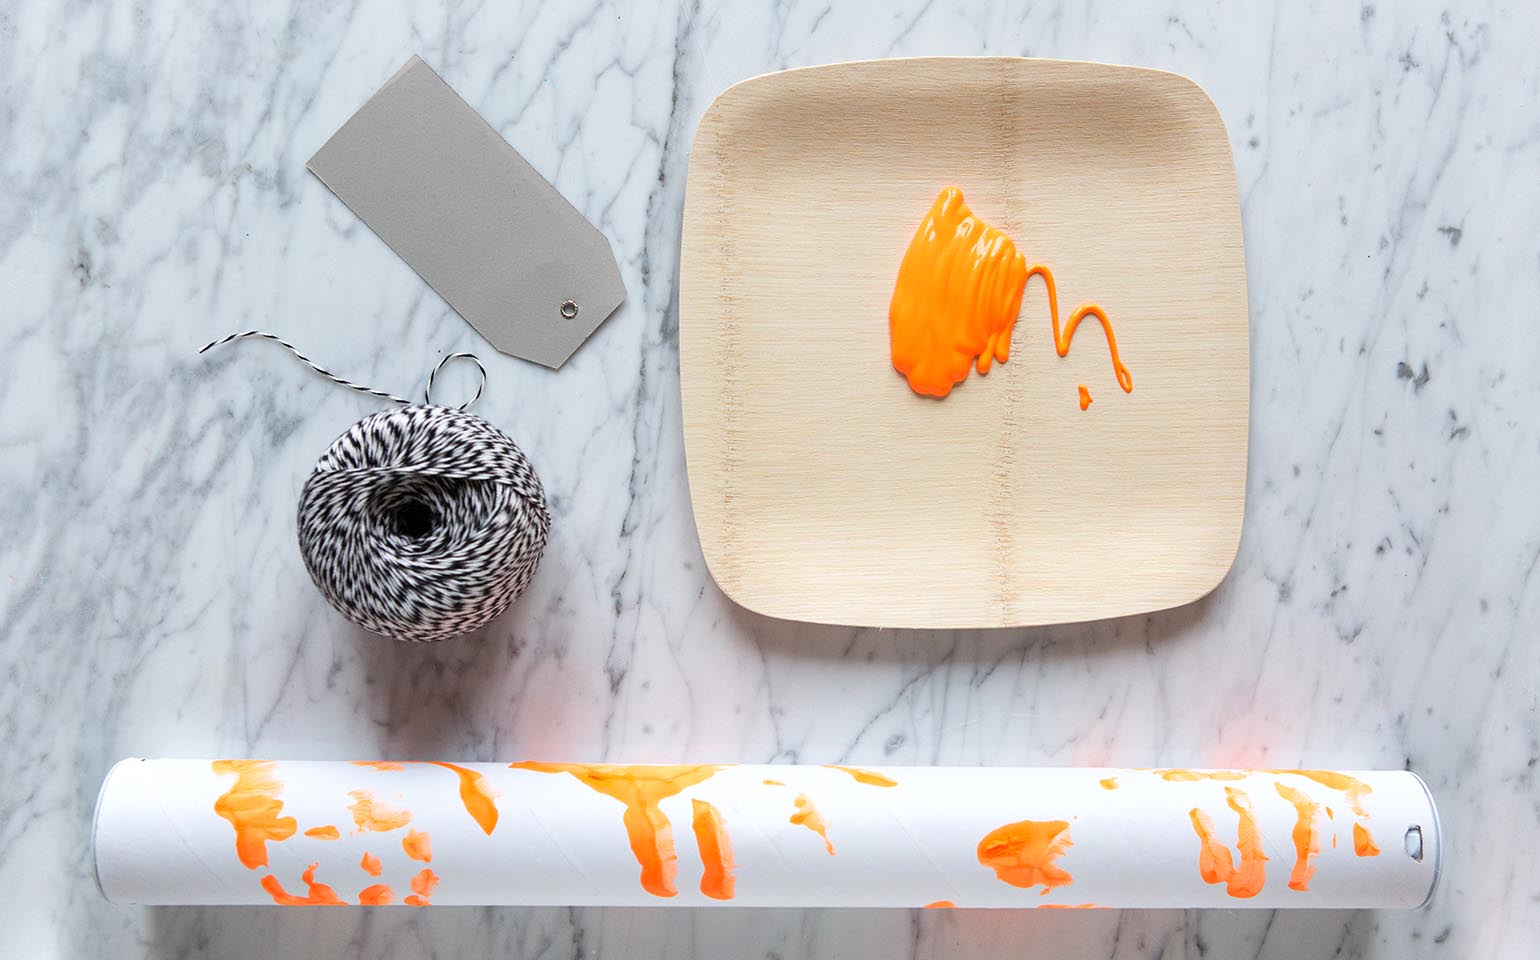
Tubular Artwork Storage
Inexpensive and available in a variety of colors and sizes at office supply stores, nothing beats a mailing tube for packaging flat items. To make your mailing tube a work of art itself, have your child press their hand into washable paint and stamp their handprints on the exterior. Once the paint is dry, use twine and a paper tag to label the tube, indicating the name of your child and the year. Kids will love the interactive craft, and you’re left with a sentimental storage piece that perfectly represents your child’s artwork. Tubular Artwork Storage


SHARE