
Set Yourself Up for Success
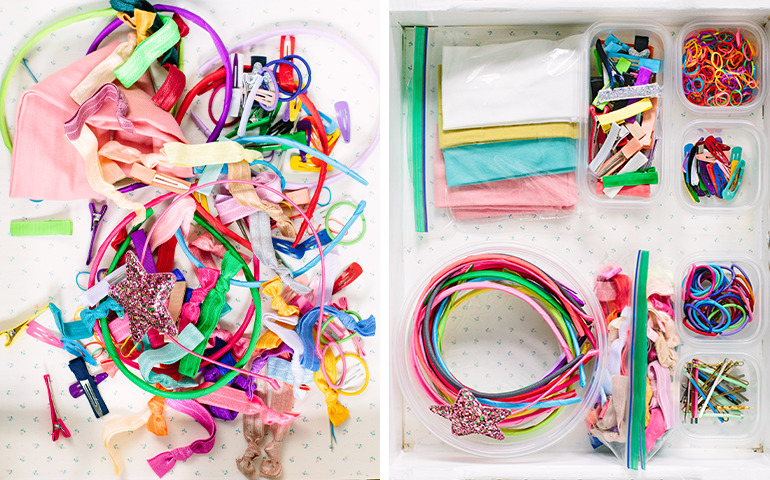
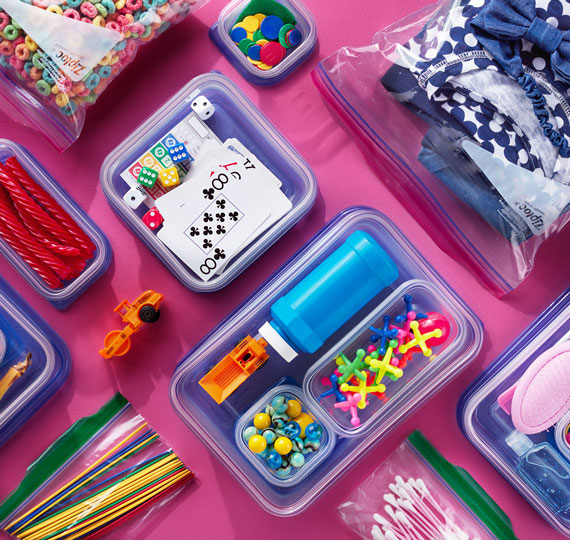
The fastest way to shave time off your morning styling session is to be prepared with all the tools you’ll need. Keep all your hair accessories organized and accessible using a variety of Ziploc® brand bags and containers so you’re never left frantically searching last minute.
1. Keep hair ties and bobby pins in an open small Ziploc® container for easy access. That way you won’t have to dig through the drawer or open a bag while you’ve got a ponytail in your hand.
2. Soft, cloth headbands stay cleaner and protected from stains when stored in a Ziploc® brand bag.
3. To keep the shape of more structured headbands, store them in a Ziploc® round container
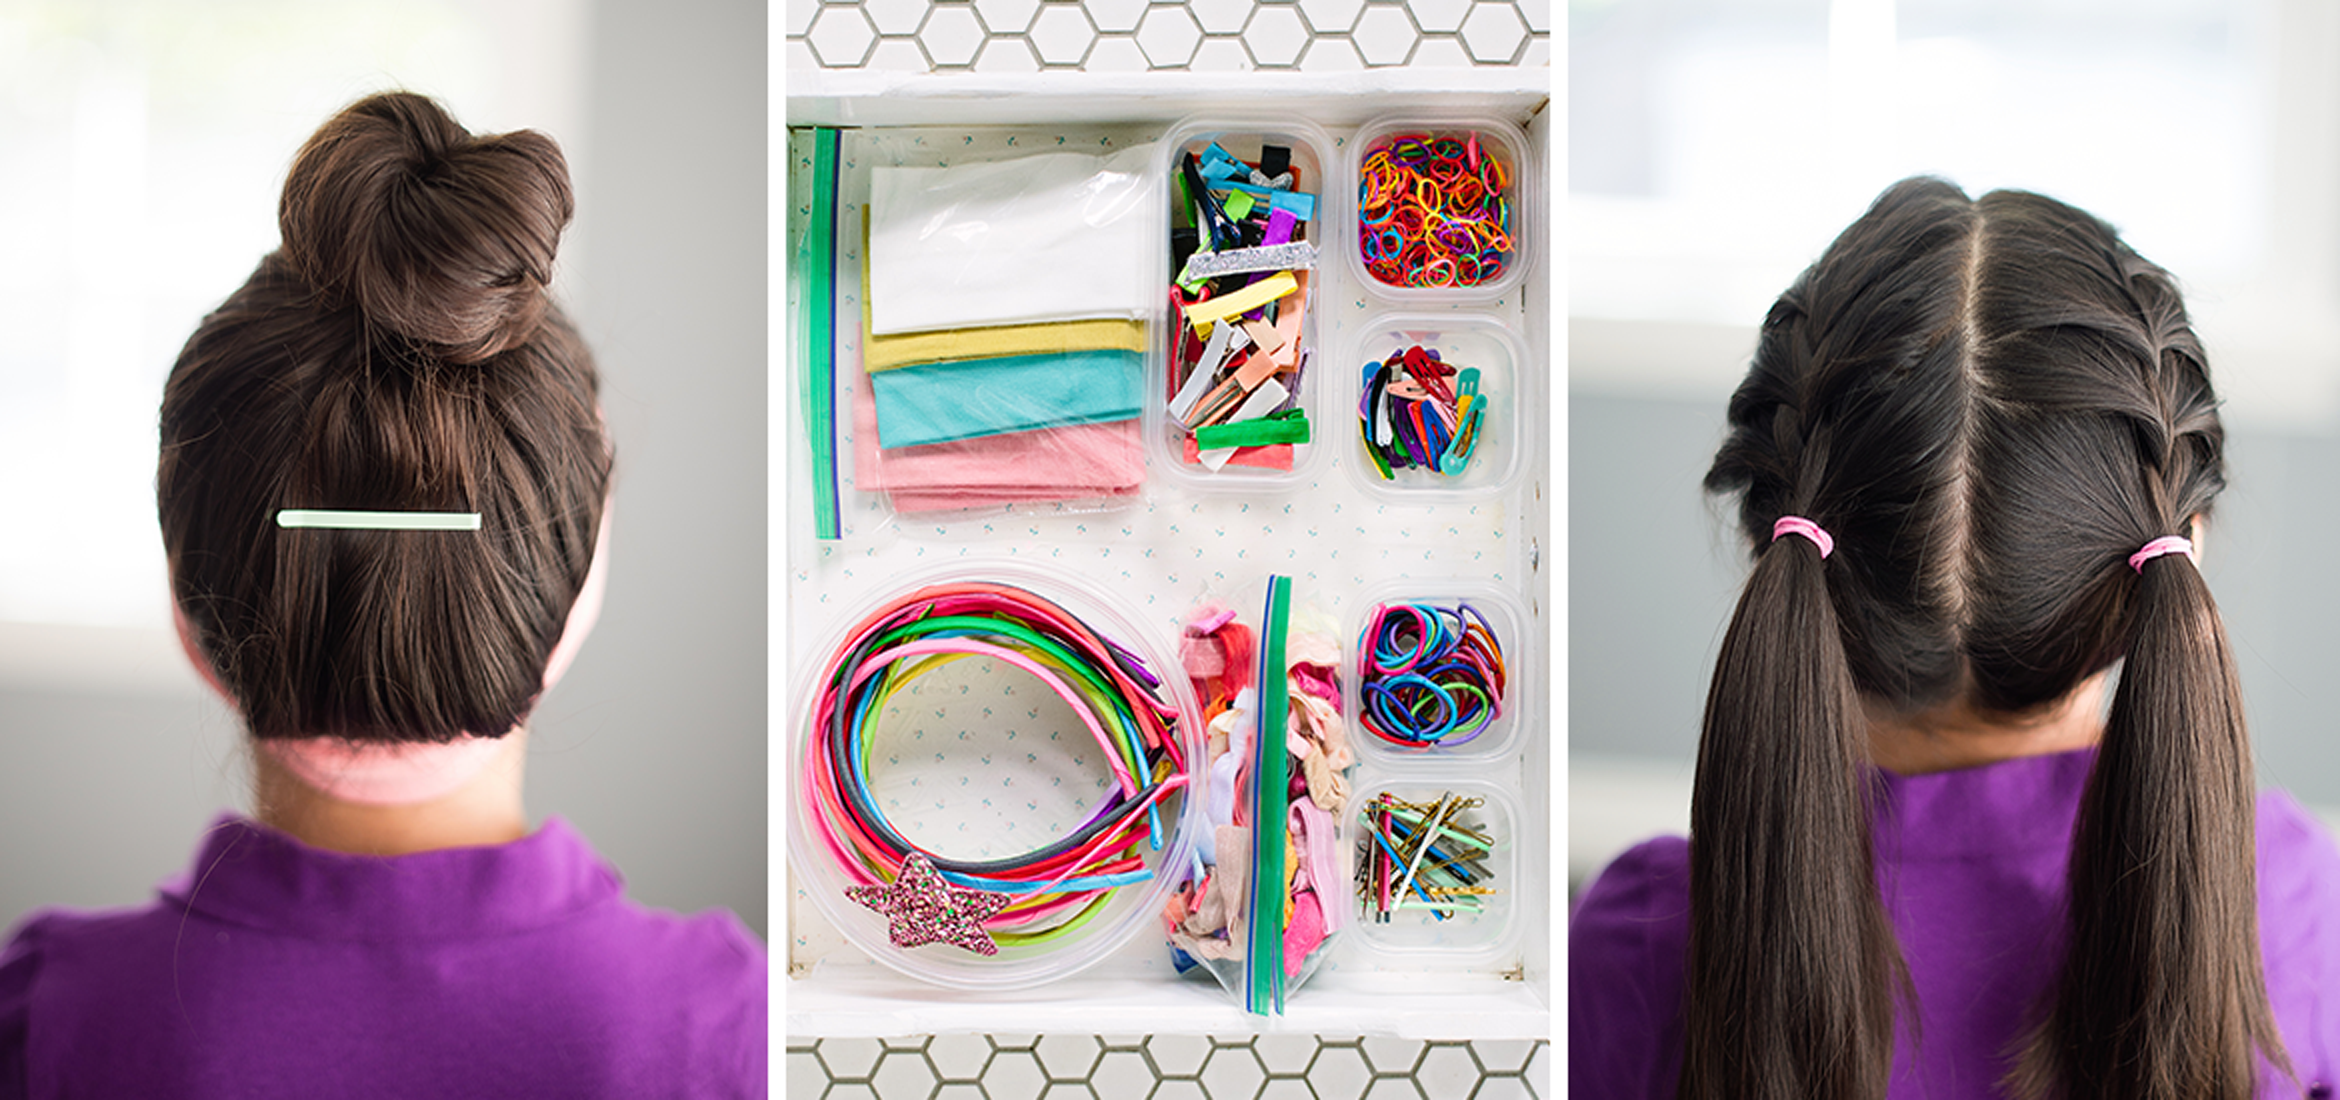
Need simple hairdos that look great, but won't make you late? Here’s 3 styles that are just as quick as they are cute!:
Set Yourself Up for SuccessThe More-Is-More Ponytail

For this look you’ll need a comb and four hair ties.
1. Begin by making a small ponytail at the top of the head.
2. Incorporating hair from both sides of the head, make another ponytail slightly below the first. (Your final ponytail should end at the nape of the neck, so try to space accordingly).
3. Continue moving down the head, parting sections of hair and sweeping into a ponytail until the style is completed.
See, even a slight variation on a basic style can go a long way!
The More-Is-More Ponytail
2. The Recess-Ready Top Knot
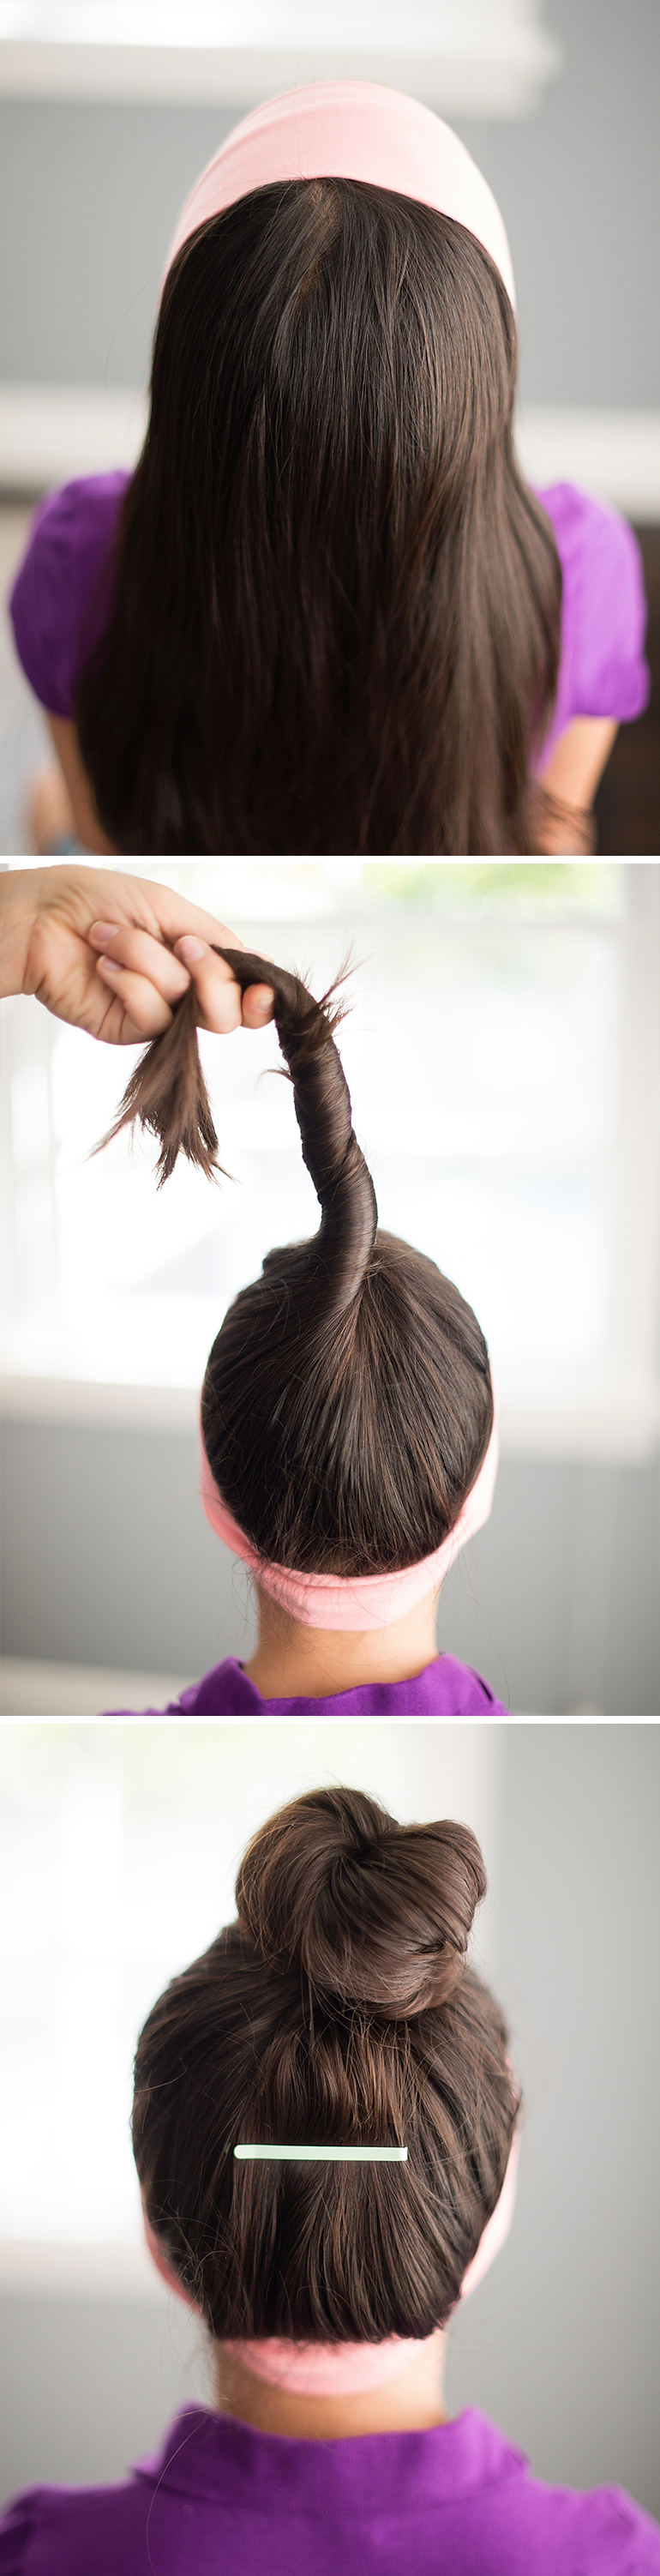
For this look you’ll need a stretchy headband, hair tie, 1-2 bobby pins, and a brush.
1. Begin by pulling the headband on to the desired place on the head. (If the hair is fine, consider adding some hairspray or mousse to add texture and volume).
2. With headband in place, pull a high ponytail into your hands - the highest it can go.
3. Take ponytail and twist counterclockwise.
4. Once the whole ponytail is twisted, begin to wrap it around the base, forming a knot.
5. Finish by securing the hair that’s sticking out around the knot, and secure it with 1-2 bobby pins.
This method works with a variety of hair lengths and thicknesses, as well as any fashion headband you’d like.
2. The Recess-Ready Top Knot3. Double Trouble Pigtail French Braids
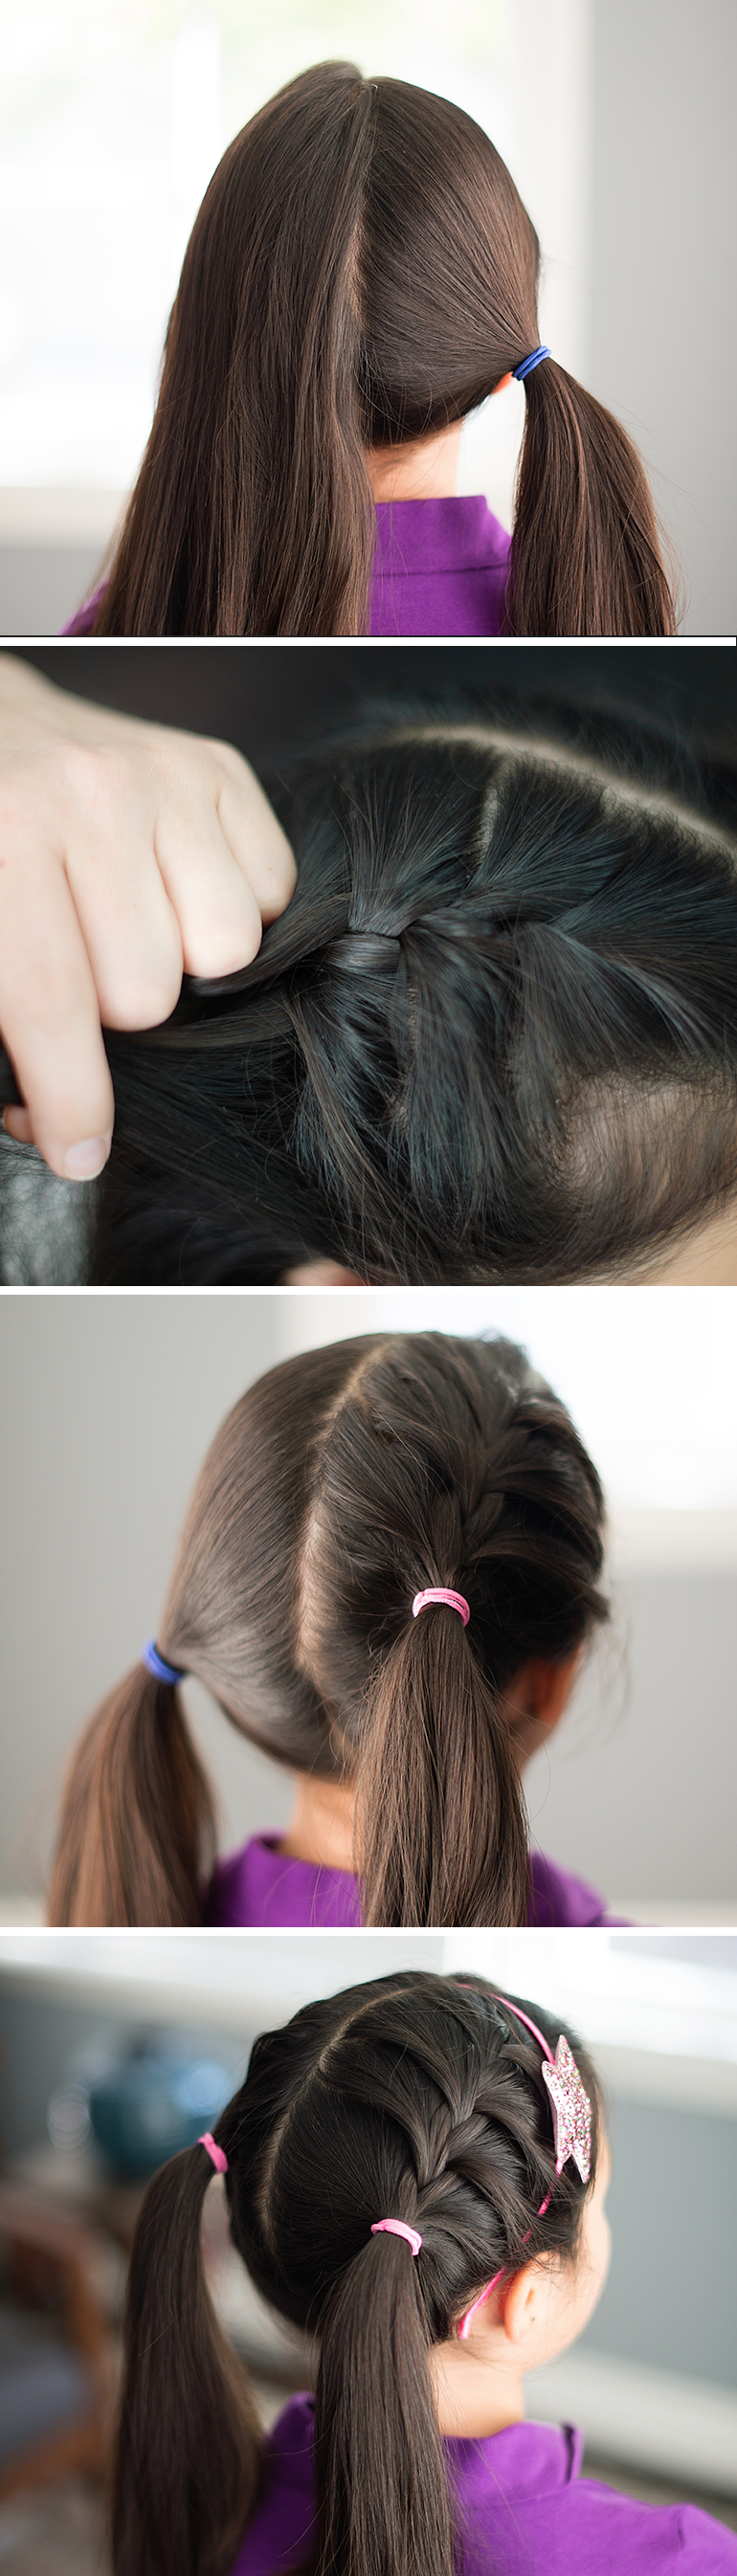
For this look you’ll need a comb and two hair ties.
1. Begin by parting hair down the center. Tie the left side out of the way for now.
2. Take the right side, and separate three small pieces of hair at the top of the part line. Hold them in your right hand, with each small section separated by one finger.
3. Using your left pinky finger, scoop up a small section of hair and add it to the leftmost section of hair on the right side. Pull it tightly across the top of the center section, so that the center section is now the left section and the left section is now the center section.
4. Repeat Step 3 starting on the rightmost section of hair, using your right pinky finger, adding it to the left side.
5. Do this three times so that you have the start of a French braid.
6. Holding the braid in your right hand, scoop the remaining hair into a ponytail and secure with a hair tie.
7. Repeat steps 2-6 using the hair on the left side of the head.
This style is a great compromise when your daughter wants double French braids, and still looks just as cute! And don’t be afraid to add a sparkly headband to dress this style up.
3. Double Trouble Pigtail French Braids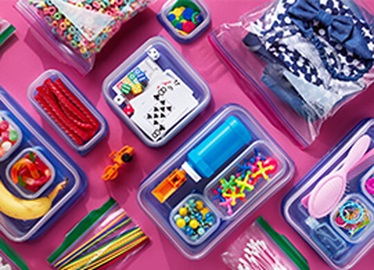

SHARE