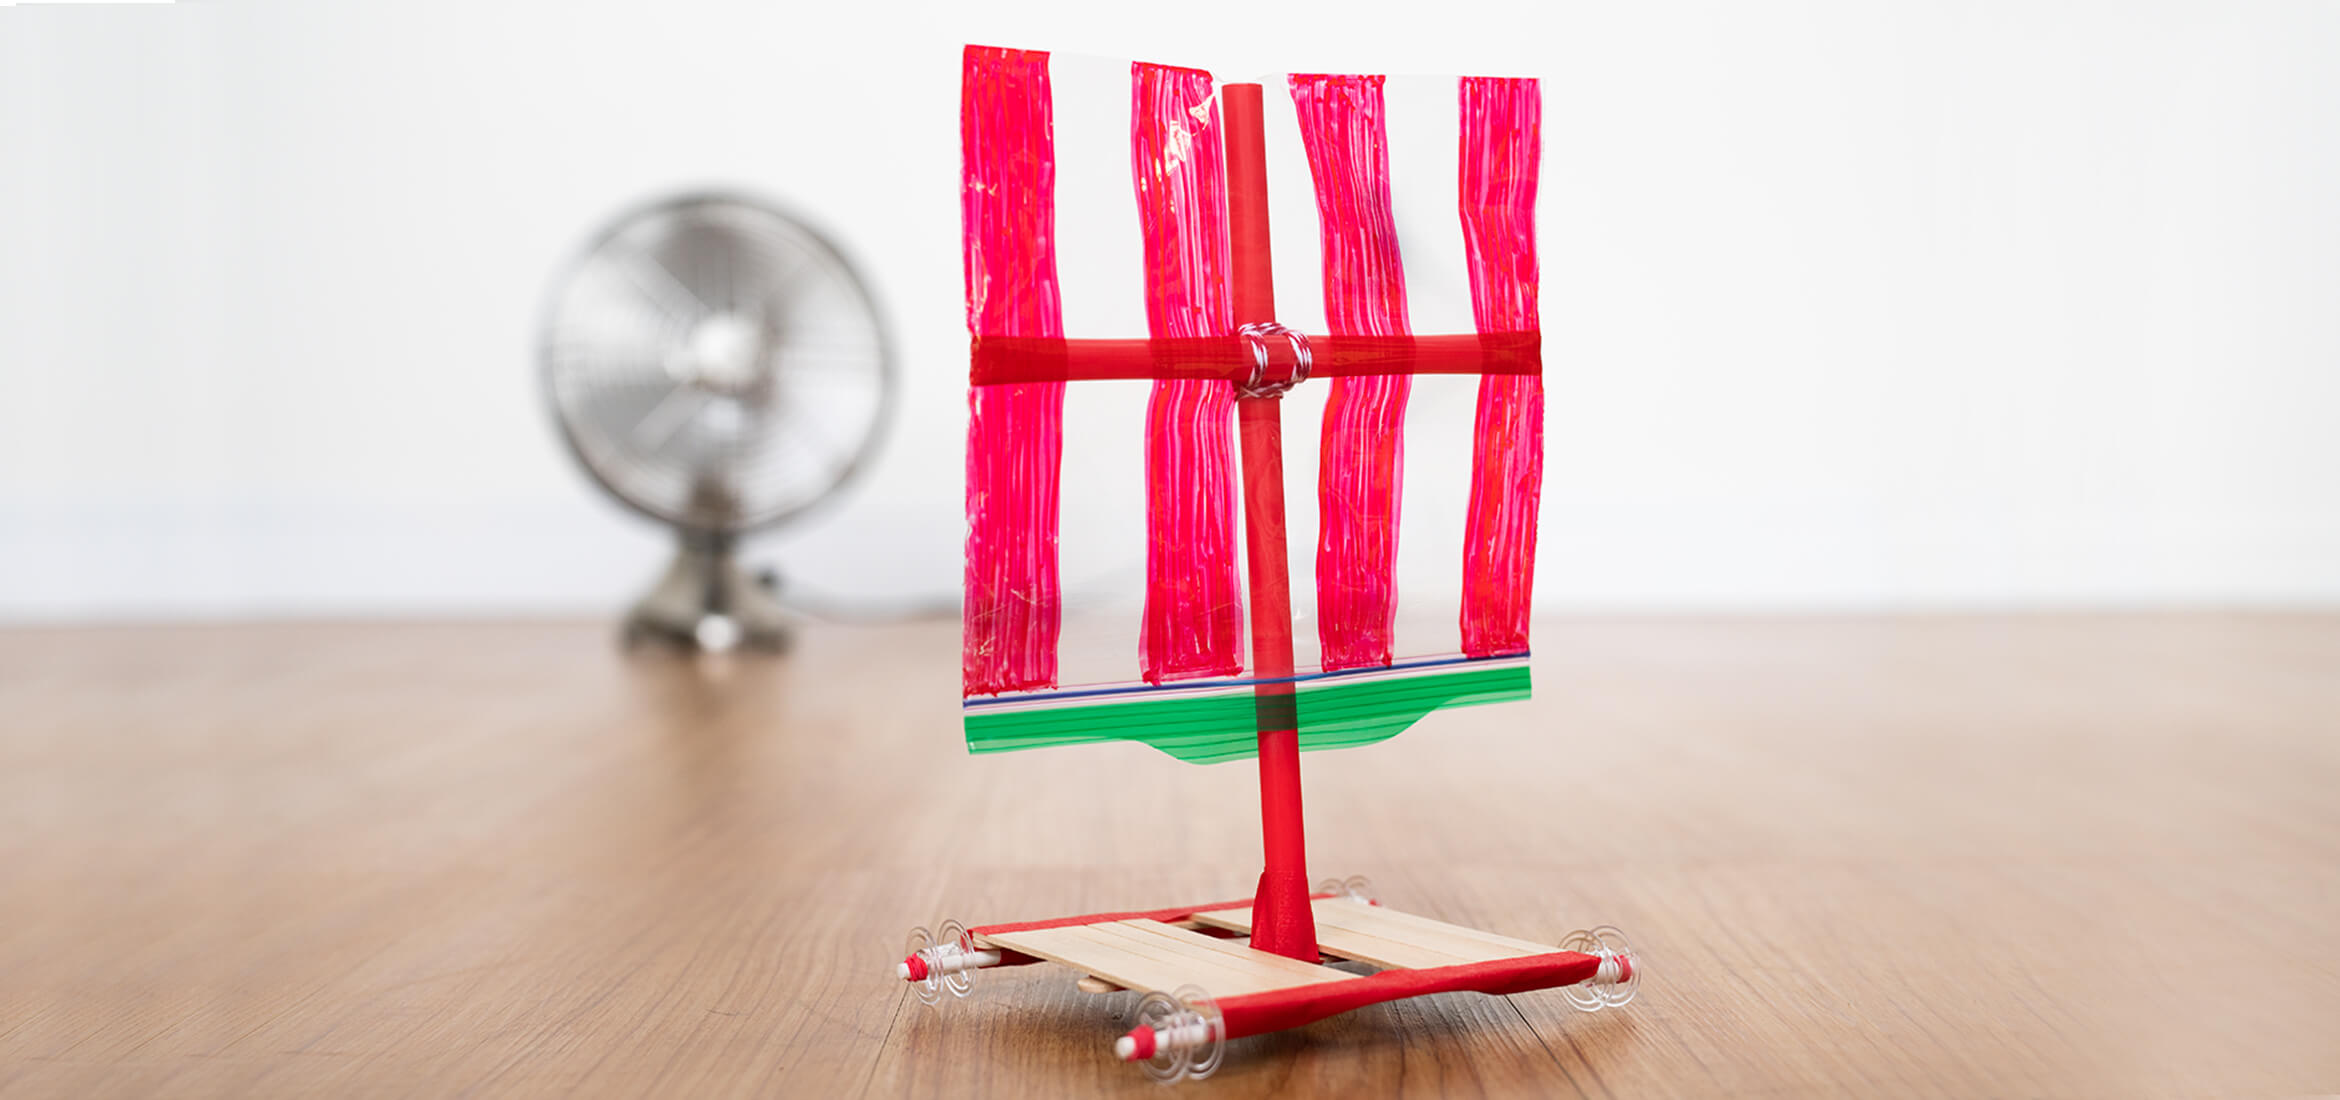

Build a wind-powered car using a Ziploc® brand bag as the sail. You’ll learn about the engineering behind basic vehicles and how different components impact the overall functionality. Conduct experiments to see how distance, speed, and time are all related. How far can you make your car go? How fast did it get there? How long did it take?
Learn More:
In engineering and design thinking, there's often more than one solution to a problem. In this project, the challenge is to make a wind powered car that goes as far and as fast as possible. There are three components of the car’s design that you can experiment with — the base, the sail, and the wheels. We’ve provided one car design here, but try thinking outside the box. Can you make the base a different shape or size? Can you build a car with only three wheels?
You’ll run multiple trials to compare each design. You can even use the printable Experiments Log to record data on distance, time, and speed. Challenge your friends to make their own wind-powered cars and race to see whose design works best!
Connections with Next Generation Science Standards (NGSS) |
|
|---|---|
Engineering Design MS-ETS1-2 Analyze data from tests to determine similarities and differences among several design solutions to identify the best characteristics of each that can be combined into a new solution to better meet the criteria for success. |
Design and build a wind-powered car. Conduct trials to measure distance and speed. Modify the design and conduct multiple trials to observe the impact. Evaluate the results to determine how well each design solution worked. |
MATERIALS
- Permanent markers (soft-tipped)
- 2 straws
- 13 craft sticks
- 2 lollipop sticks
- Scissors
- Paper or notebook
- Pencil
- Non-toxic glue
- Masking or painter’s tape
- String
- 4 plastic spools
- 4 small rubber bands
- Fan
- Stopwatch
STEPS
- 1 Gather your materials.
- 2 [Optional] A basic wind car design has wheels, a base, and a sail. Think about how you want your wind car to look and sketch out a plan. If you want to follow along with our design first, move on to Step 3. Our design is one way to do it, but there are lots of different ways to create a great wind car with other types of materials or construction methods.
- 3 The Ziploc® brand bag will be the sail. Decorate it with soft-tipped permanent markers. As you decorate, keep in mind that the bag’s green seal will be the bottom of the sail
- 4 Make a support for the sail with two straws. Cut one straw to fit inside the bag horizontally. Take a second straw and cross it over the first straw to make a T-shape. Tie them together with string or attach them with tape. Place the crossed straws inside the decorated bag. The longer straw should stick out of the bag’s opening.
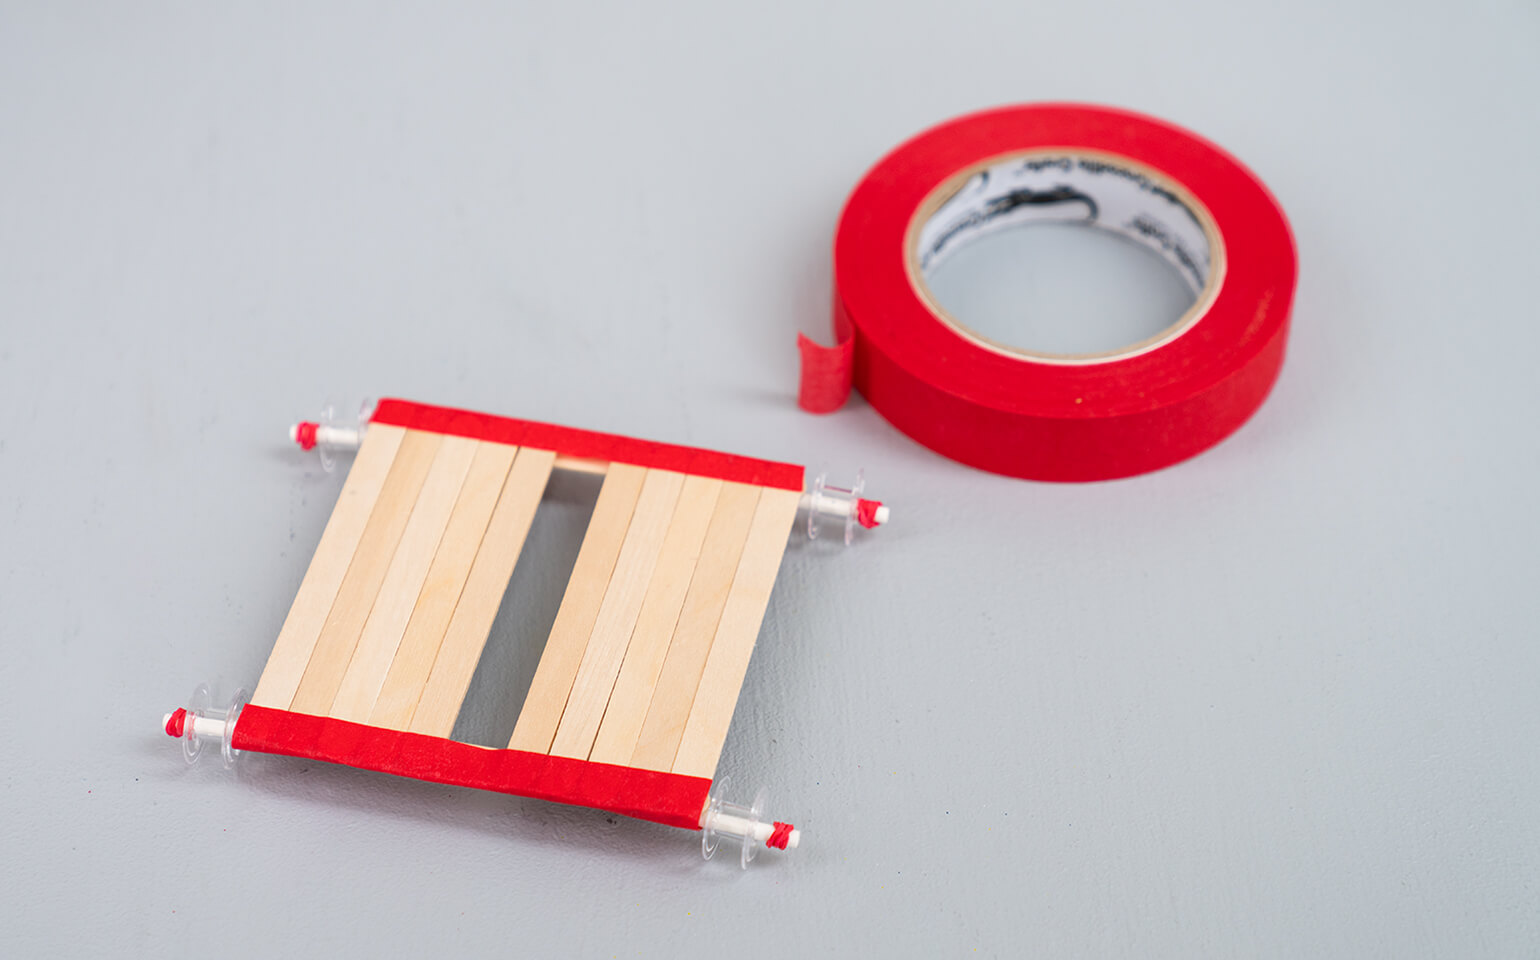
- 5 Build the base of your car so that it’s light but sturdy. Line up two craft sticks horizontally. Then use non-toxic glue to add ten craft sticks vertically on top — five from the left and five from the right. Make sure to leave a gap in the center for the sail. Let dry.
- 6 Build the wheels and axles of your car. Cut the two lollipop sticks in half so that you have four pieces, each two inches long. These sticks will be your axles. Wrap a rubber band around one end of each lollipop stick, about ¼-inch from the end. Stick the other end of the stick through a plastic spool. The rubber band will keep the plastic spool from falling off. These plastic spools will be your wheels.
- 7 Attach the axles to the craft stick base. Flip the base over so the two horizontal craft sticks are visible. Tape the axles to each of these sticks, so the four wheels are aligned to the edge of the base and to each other. Flip the car over and give it a test push to make sure it rolls straight.
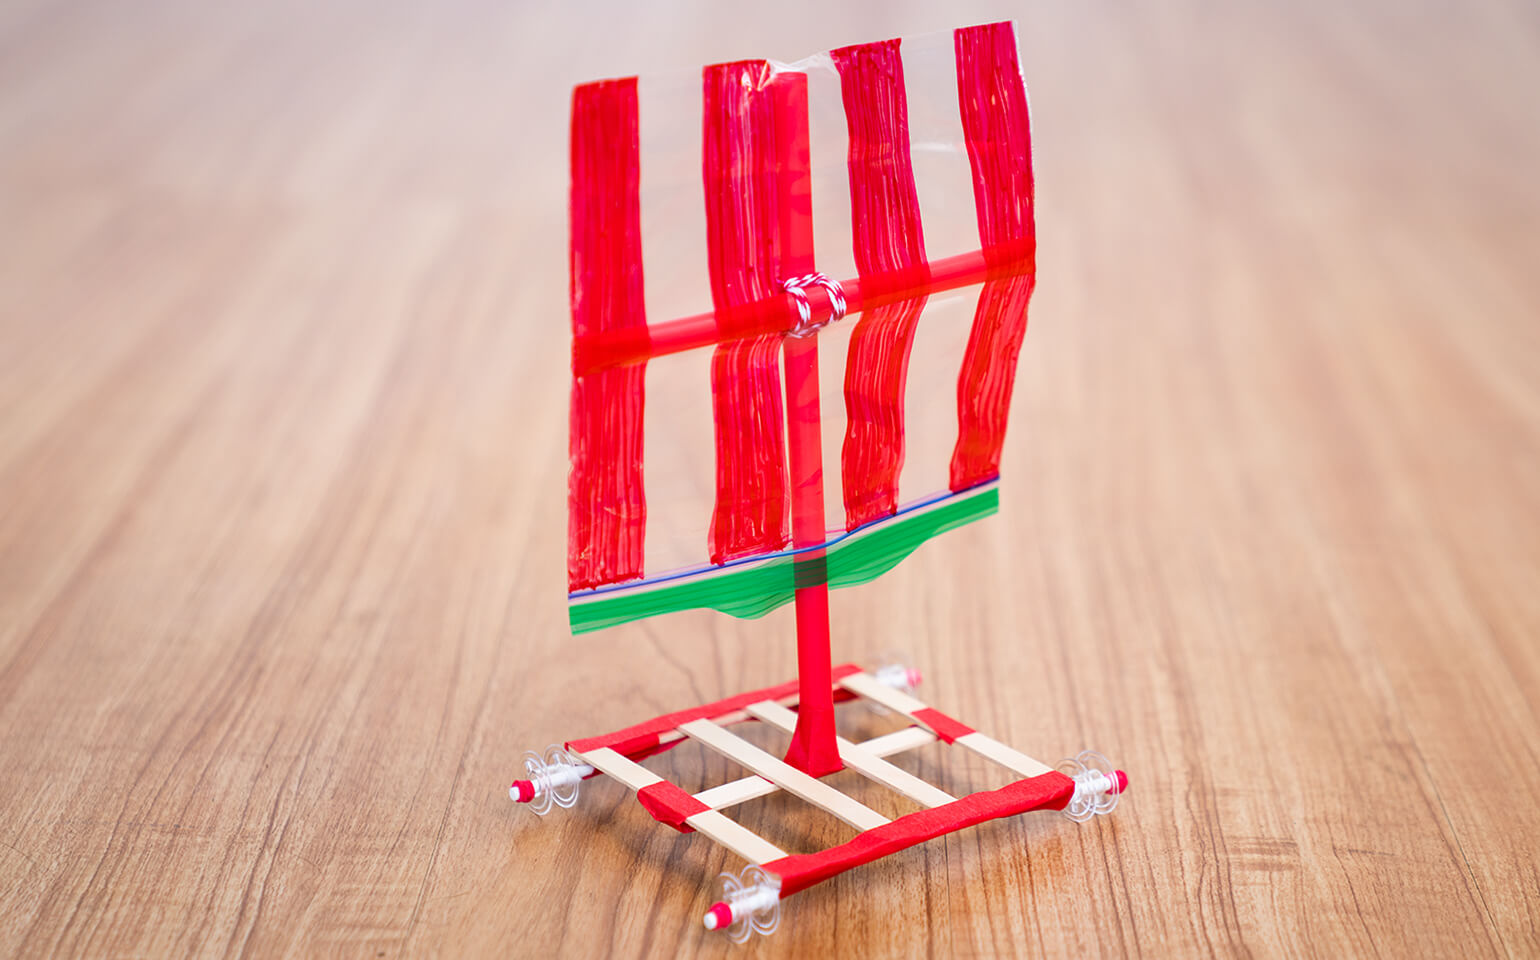
- 8 Attach the sail to the base. Hold the sail so that it’s parallel to the axles of the car and the straw pokes through the opening in the base. From the underside of the base, tape the straw to another craft stick. This craft stick should be parallel to the axles. Tape the stick to the base. You made a wind-powered car!
- 9 Now test it out! Use tape to mark a starting line in front of a fan. Place the car at this mark. Turn the fan on and start a timer with a stopwatch. Once the wind car comes to a stop, stop the timer and note the time. Use a ruler to measure how much distance the car traveled. Use the Experiments Log to record the time and distance. To calculate the speed of the car, divide distance by time. Conduct three more trials and then calculate the car’s average distance, time, and speed.
- 10 After you record the initial results, try tinkering with different parts of the wind car. What can you change to make it move faster or farther? Run another test with the new design and record the results. By testing and recording results with each change, you can measure the impact of that specific change. Keep experimenting until you get a final design that you’re happy with! [Ideas: Make the base with cardboard instead of craft sticks. Create a support structure for the sail with dowels or sticks instead of straws. Swap out the plastic spools for plastic bottle cap wheels. Once you start thinking, you’ll discover that there are so many ways to think creatively with different found objects around the house!]


SHARE